Mad idea?
At Microsoft //build/2013, I received an Acer Iconia W3 8″ Tablet. Even back in 2013, the tablet, which come with Windows 8 Home, is under powered and with a TN LCD screen, it is very hard on eyes to use.
Since then I have upgraded it to Windows 10 via the free upgrade and Microsoft finally stop supporting the CPU and therefore unable to upgrade to newer version of Windows 10 except for security update.
Typically, old hardware could be used to run a more lightweight Linux. However, this CPU is 32-bit and has all sort of compatibility problems with Linux. Not giving up the hardware which come with a battery, consume little power and fanless. I have decided to turn it into a server for fun.
Why NodeJs?
NodeJs is lightweight, support Win32, easy to code and find libraries and frameworks. Besides, using .NET Core on Windows platform is not that challenging.
Azure App Service = IIS + Kudu + magic
I have been using Azure since inception when the Cloud and Storage services were still in beta. Nowadays, we have Azure App Service. One of the feature it offer is to use git to deploy code. Which make deployment very simple when building proof of concept.
Under the hood, App Service Windows Platform is powered by IIS and Kudu plus some infrastructure automation magic. I am going to go through how to setup both and some manual infrastructure configuration to make our own app service all on a Win32 tablet.
Installing NodeJs and git for Windows
Since I am trying to setup a Win32 tablet, I need to download the 32-bit version of NodeJs and git for Windows.
Download and install NodeJs:
https://nodejs.org/en/download/
Download and install git for Windows:
https://git-scm.com/download/win
Installing IIS
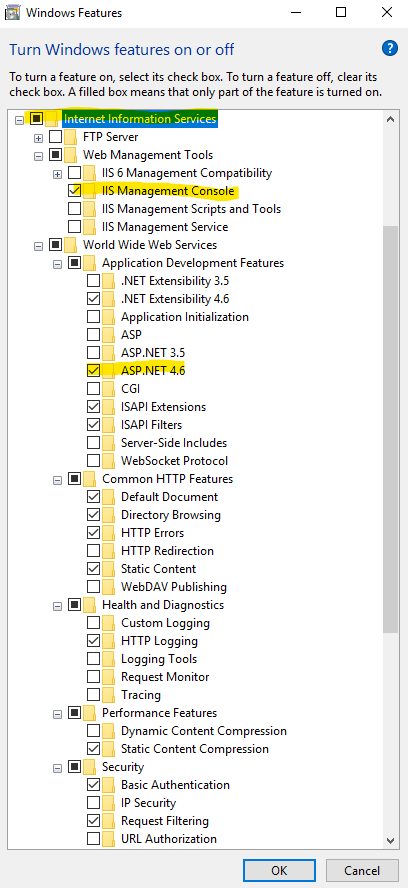
Start -> Search for Windows feature -> Click Turn Windows features on and off -> Click Internet Information Services -> Make sure Application Development Features\ASP.NET is also selected -> Click OK to start installation
After IIS is installed we will need to download and install a couple of IIS modules:
IIS URL Rewrite module is required for iisnode to work correctly. Download and install IIS URL Rewrite module from Microsoft:
https://www.iis.net/downloads/microsoft/url-rewrite
iisnode is needed to host the node process in IIS. Download and install iisnode Release from Github:
https://github.com/Azure/iisnode/releases
Installing Visual Studio
Download and install the latest version of Visual Studio:
https://visualstudio.microsoft.com/
The reason to install Visual Studio is to make sure all the relevant target files which required by Kudu are installed correctly and setting up path for commands. I believe we can get away with installing the build tools and the target packages only. But since this is a home project, it is easier to just install Visual Studio.
Installing Kudu
Download Kudu Release from GitHub
https://github.com/projectkudu/kudu/releases
Open the downloaded zip file and follow the steps below:
- Copy
KuduWebtoC:\inetpuband createApp_Datafolder inKuduWeb. - Right click on
KuduWeb->Properties->Securitytab ->Editpermission ->AddIIS_IUSRSwithRead & execute,List folder contentsandReadpermission - Open IIS manager, create a new application pool called
KuduWebthen edit theAdvanced Settingsand changeIdentitytoLocalSystemso that Kudu can manage IIS - Create a new website calling
KuduWebselectingKuduWebas application pool and set to path theC:\inetpub\KuduWeb. Set a port number of your choice. See the screenshot below. - Copy
SiteExtensions\KudutoC:\inetpuband rename it toKudu.Services.Web - Create a new folder
appsinC:\inetpuband setUsersgroup with full access permission toC:\inetpub\appswhich is where new sites are created by Kudu.

You may choose to copy contents of KuduWeb folder directly into wwwroot and skip step 2-4 above. That means Kudu will be installed on the IIS Default Web Site, however you will still need to change the Identity of the DefaultAppPool to use LocalSystem. The reason to create a separated website is to allow me to use the default web site as a reverse proxy later.
Open browser and go to http://localhost:38380 (where 38380 is your Kudu port number) will open the Kudu Dashboard. Click Admin at the top right corner and verify the setup is done correctly.
Creating new website using Kudu
On Kudu Dashboard, click Create Application and enter the name of the website and click the Create application button. Kudu will generate a SCM and application website using a randomly generated port number.


Setting up Reverse Proxy
Now the SCM and website are created, however they are protected by firewall and it is not accessible outside of localhost.
Download and install Application Request Routing module:
https://www.iis.net/downloads/microsoft/application-request-routing
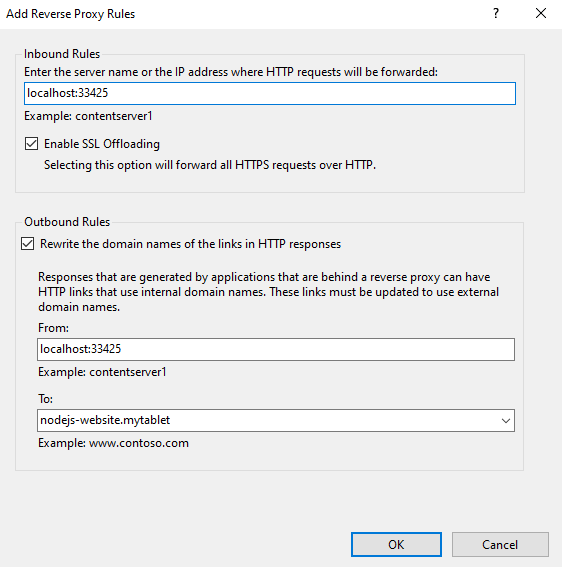
In IIS Manager open Default Web site -> Under IIS section open URL Rewrite -> Right click and Add Rule(s)... -> Select Reverse Proxy
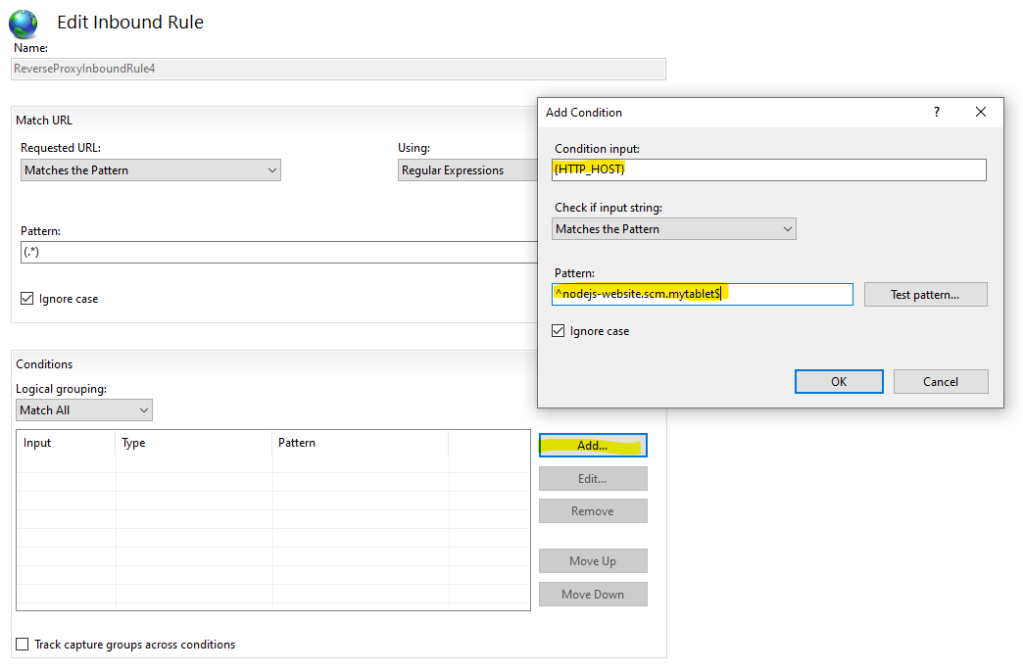
Create a rule for the SCM of the new website using the details above. Service URL localhost:23669. Note that, I also have an outbound rule to rewrite domain names of links in HTTP responses. In this case I use nodejs-website.scm.mytablet as the domain name.

Double click to edit the new rule and add a condition which check the host name with a regular expression pattern.
- Condition Input:
{HTTP_HOST} - Patterns:
^nodejs-website.scm.mytablet$ - Click
OKthenApplyon the right in IIS manager
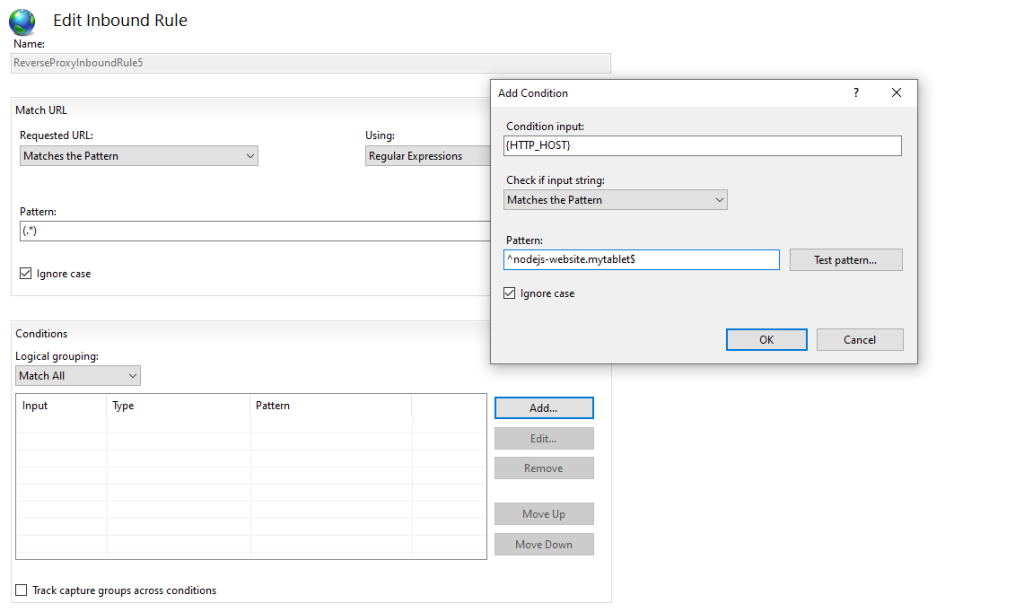
Follow the same instruction to create a new rule for the application website. Application URL localhost:33425 and rewrite the domain name to nodejs-website.mytablet. Make sure you also add a condition to the rule using ^nodejs-website.mytablet$
Edit Bindings of the Default Web Site and add two bindings. One for the SCM and one for the application.
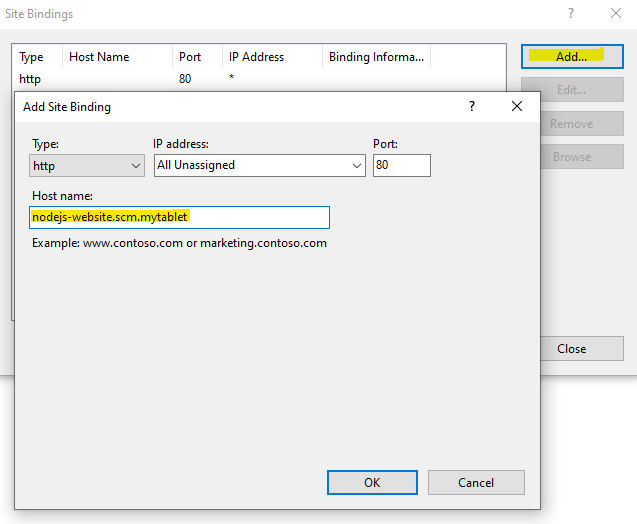
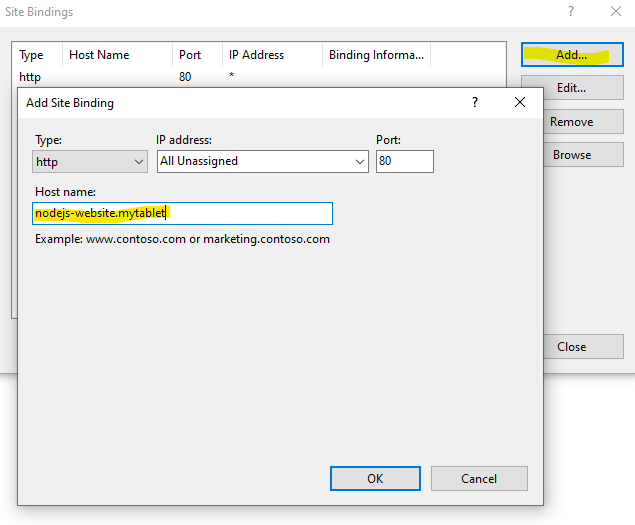
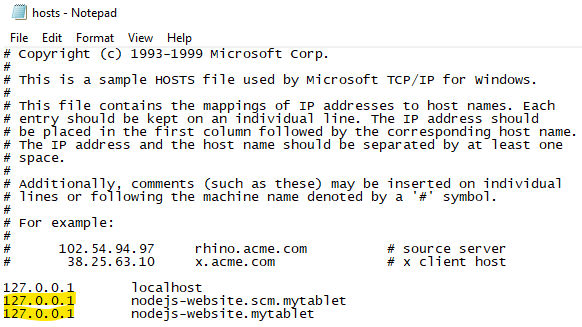
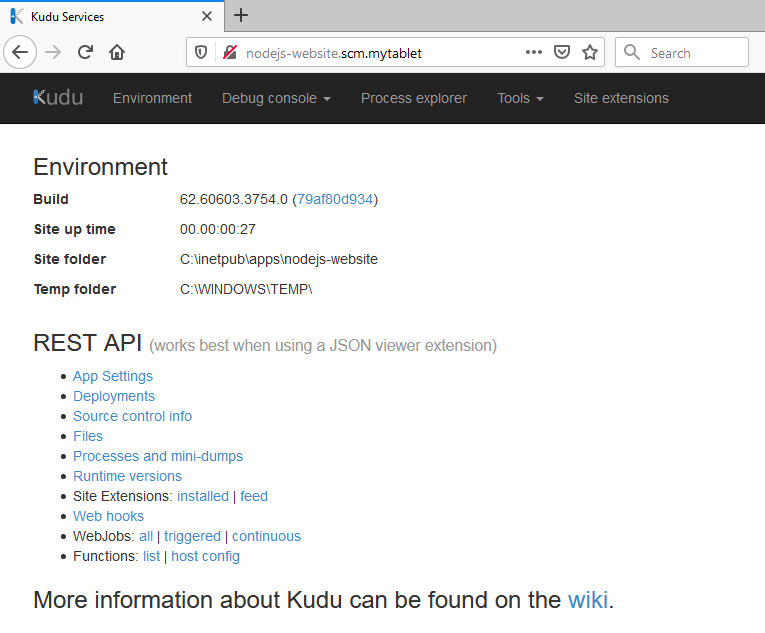
Now add these two domains into your hosts file or DNS server pointing to the IP of the server. Then you may access the SCM via http://nodejs-website.scm.mytablet. Check firewall rule if that does not work. TCP Port 80 need to accept inbound request.
Deploy NodeJs website with git
Now with the above Reverse Proxy setup. The GIT URL can be access outside of the machine via HTTP port 80 on http://localhost:23669/nodejs-website.git http://nodejs-website.scm.mytablet/nodejs-website.git
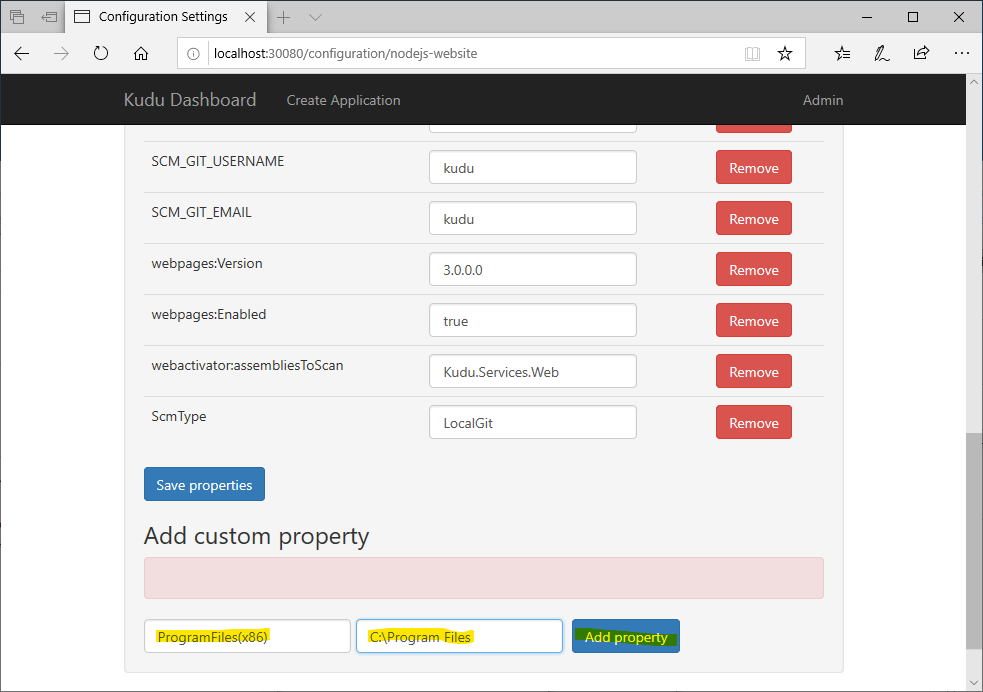
However, there are some quirks with Win32 and Kudu which will cause error when deploying NodeJs application. Win32 does not have C:\Program Files (x86) folder, however Kudu is expecting a ProgramFiles(x86) environment variable pointing to C:\Program Files (x86). To work around this, go to the Configuration of the nodejs-website and add a custom property ProgramFiles(x86) pointing it to C:\Program Files. This will allow the deployment to go through.
When Kudu create a new application, it will create a new user profile to go with the new application pool which it created for the application website. However the user profile location is not set correctly which will cause npm install to fail. Add the following custom properties to get around this problem. Note that, in this example, nodejs-website is the user profile created by Kudu.
| Property name | Property value |
USERPROFILE | C:\Users\nodejs-website |
APPDATA | C:\Users\nodejs-website\AppData\Roaming |
LOCALAPPDATA | C:\Users\nodejs-website\AppData\Local |
After adding the above custom properties, we are ready to deploy the application.
For details on how to create a NodeJs website, there are many different frameworks and ways to do so. I am going to skip the details. However, I am using koa in this example.
Create server.js with the following code and commit it to master branch. iisnode will run server.js automatically after the deployment. iisnode will provide a PORT via environment variable for NodeJs HTTP server to listen to. Hence, the code to start the server is written this way app.listen(process.env.PORT || 3000);
const Koa = require('koa');
const app = new Koa();

app.use(async ctx => {
  ctx.body = 'Hello World from NodeJs website';
});

app.listen(process.env.PORT || 3000);
Now create a new remote for the git deployment. Let’s call it deploy and using the example above run this git command:
git remote add deploy http://nodejs-website.scm.mytablet/nodejs-website.git
To deploy, run the following git command:
git push deploy master
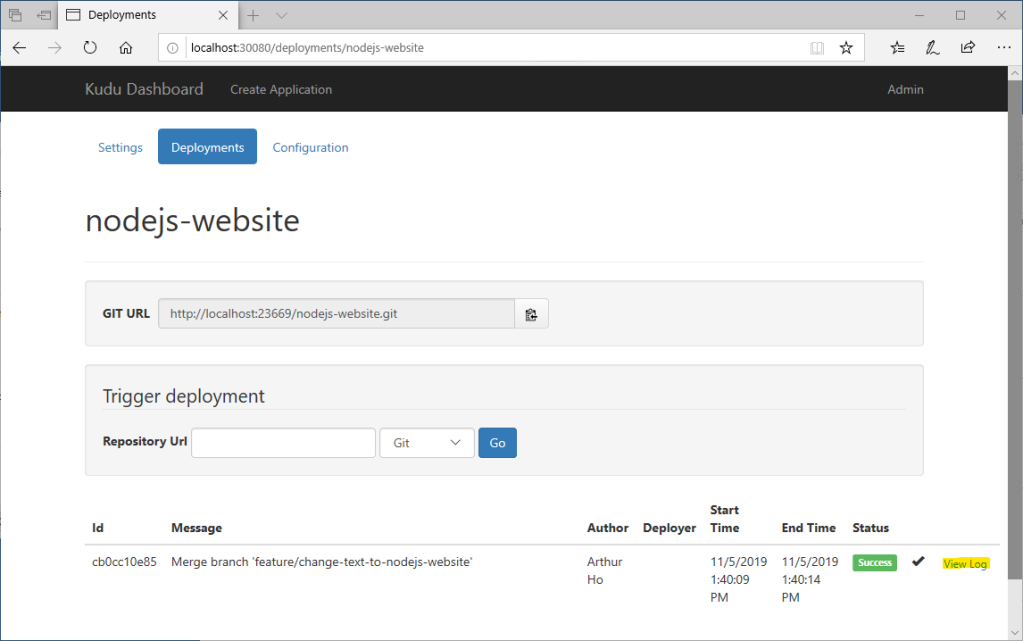
We should see a series of output prefixing with remote which shows the things happening during the deployment. After the git command is finished. Let’s check out the Deployments of nodejs-website on Kudu. Click View Log to review the deployment logs for debugging.
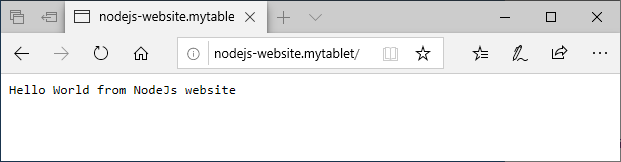
Now the NodeJs application is deployed, we can hit the site using the domain which we setup earlier. Open the browser and go to http://nodejs-website.mytablet/
That’s it! Now, I have my own version of app service running on an old Win32 tablet. We can further secure the site by adding authentication and HTTPS.
Conclusion
We have seen how to install Kudu and its dependencies such as IIS, NodeJs and git. We have also take the extra step to setup a reverse proxy and additional bindings to allow the server to serve different websites via different host name. We have also work around some quirks around Win32 and Kudu. Finally, we have deployed the NodeJs application to the server with git.
Next, I wonder if I could host the function app runtime in there too. It is a project for another day 🙂
References:
- https://github.com/projectkudu/kudu
- https://github.com/projectkudu/kudu/wiki
- https://github.com/projectkudu/kudu/wiki/Deploying-to-a-server
- https://github.com/projectkudu/kudu/wiki/Getting-started
- https://github.com/Azure/iisnode
- https://github.com/Azure/iisnode/wiki
- https://www.iis.net/downloads/microsoft/url-rewrite
- https://github.com/tjanczuk/iisnode/issues/214
- https://github.com/tjanczuk/iisnode/issues/464
- https://github.com/tjanczuk/iisnode/issues/542
- https://stackoverflow.com/a/26492255/382979
- https://www.iis.net/downloads/microsoft/application-request-routing
- https://forums.iis.net/t/1155754.aspx?Sub+Domain+Rewrite
